Home
/ How To Install Wainscotting : Nail into place with 1 ¼ finish nails.
How To Install Wainscotting : Nail into place with 1 ¼ finish nails.
How To Install Wainscotting : Nail into place with 1 ¼ finish nails.. What is the right height to install wainscoting? You may prefer to use new baseboards with a groove to hold the lower ends of the wainscoting boards. Hold your first wainscoting panel in place and secure it to the wall using your caulk gun and construction adhesive. 0:00 prep ⁄ remove molding. Über 7 millionen englischsprachige bücher.
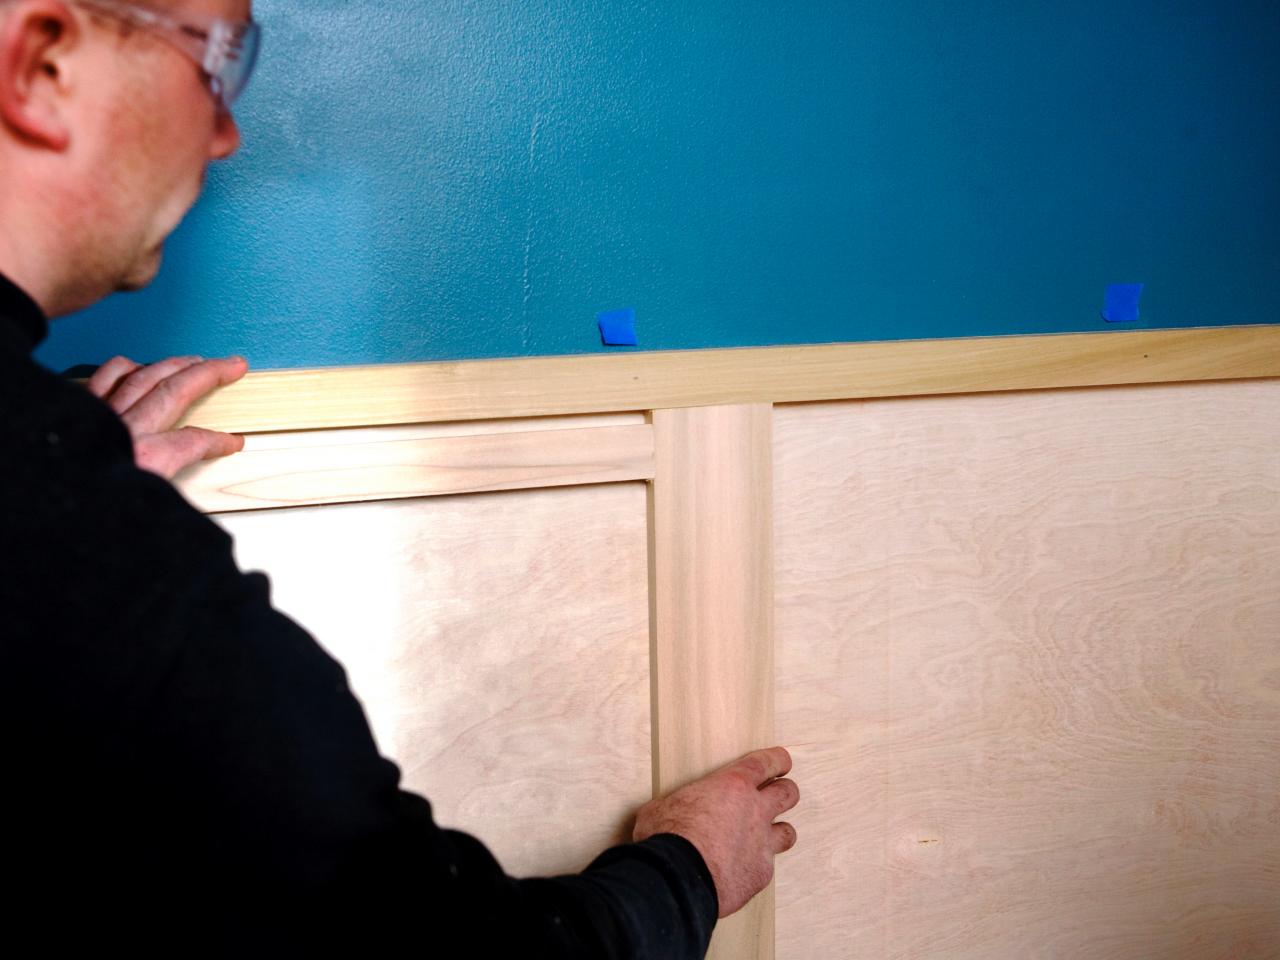
The top of the panel should be flush with the level line on the wall and 1/16 inch from the adjacent wall. Fit together any tongue and groove systems that your panels may have; Get out the tape measure. Using a handsaw or circular saw, cut the wainscoting panels to the desired height. Apply a generous amount of adhesive to the back of the first panel and press it against the wall (image 2).
How To Install Recessed Panel Wainscoting How Tos Diy from diy.sndimg.com Installing wainscoting may seem like a com. Apply a generous amount of adhesive to the back of the first panel and press it against the wall (image 2). While i was putting up wallpaper, donnie put together the. Installing wainscoting can be a tedious process, but it gives a look that you really can't reproduce any other way. Measure from the floor to the height you want (we recommend 35 inches), then use a level. If your wainscoting design includes base molding, install those pieces before the panels. Measure up from the floor to the height you want your wainscot (ours is 35 inches), then use a level (or ideally, a laser lever) to extend this mark across the length of the wall. Long cuts on a few of the moldings require a table saw.
Über 7 millionen englischsprachige bücher.
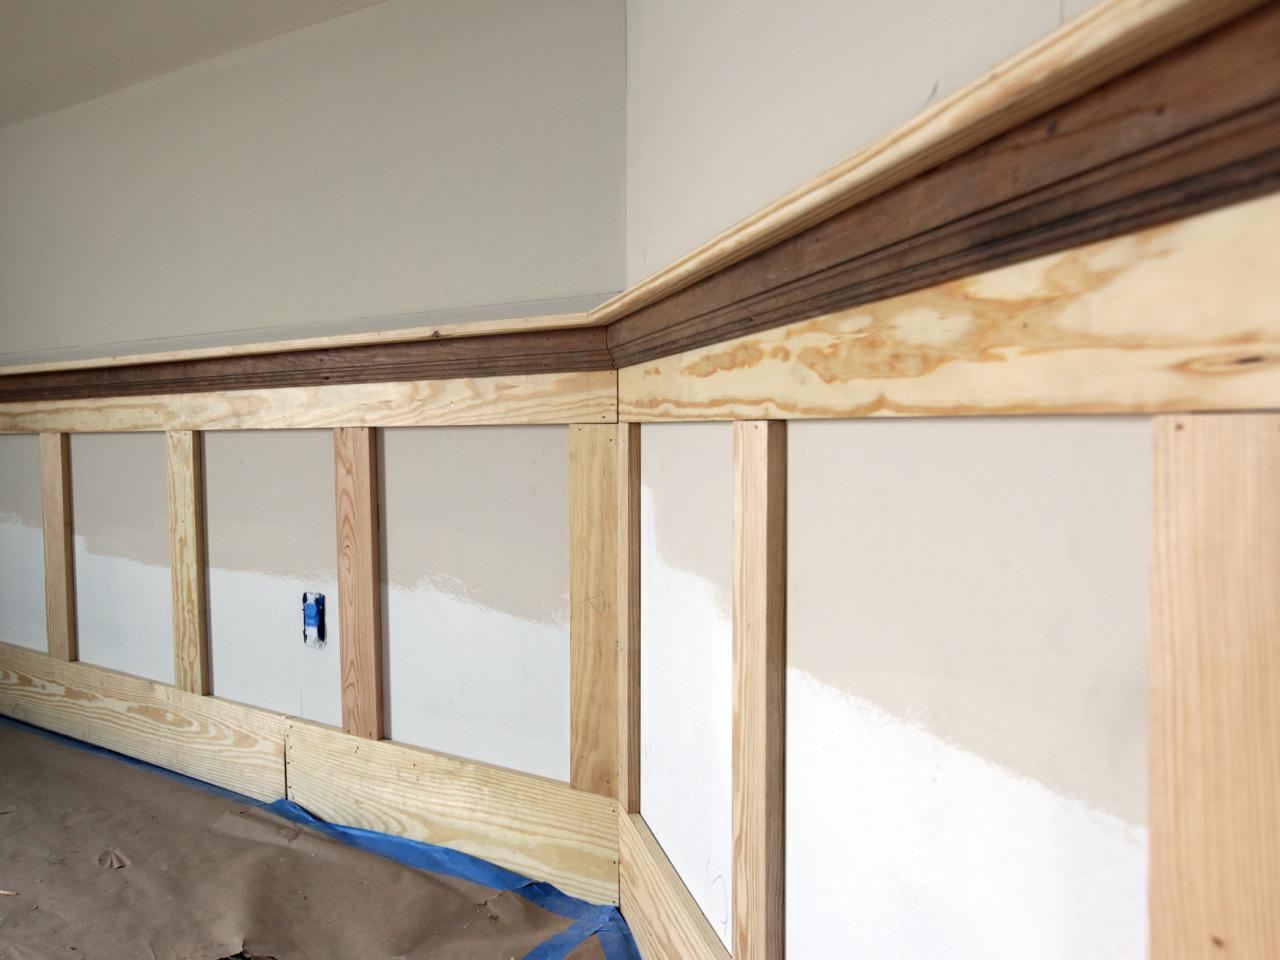
This line marks the top of the paneling and upper rail. How to install wainscoting for a diy board and batten look. So, if your ceiling is 96 above the finished floor then ⅓ of that would be 32. Follow along to learn how to install wainscoting the easy way. Slip each board's groove over the tongue of the previous one and align top edge with the layout line. Start a wainscot installation where it's most visible, and try to end it where it's least conspicuous. Apply adhesive to the backs of the baseboard pieces in a zigzag pattern and press them firmly into place. When installing wainscoting, adjust the top edge to avoid running into windowsills or other trim in the room. Since we were doing wallpaper above our wainscoting, we decided to install the wallpaper before we added the top trim piece to the beadboard. Apply adhesive to the backs of the vertical wainscot boards/panels and press them into place on the wall. Über 7 millionen englischsprachige bücher. 4:53 install staircase wainscoting w ⁄ biscuits. Apply a generous amount of adhesive to the back of the first panel and press it against the wall (image 2).
Balance a level on top and adjust until bubble shows board is level. Step 1 pick your look photo by meg reinhardt. To install tongue and groove wainscoting, you'll need basic hand tools, a circular saw, a jigsaw and a pneumatic finish nail gun to complete this project. You may prefer to use new baseboards with a groove to hold the lower ends of the wainscoting boards. Use a jigsaw or keyhole saw to cut the holes.
How To Install Shaker Style Wainscot How Tos Diy from diy.sndimg.com Place the wainscoting place the wainscoting onto the wall with the bottom resting on the mdf strips that were added at the base. In total, we spent just under $200 on all of the wainscoting and supplies, which includes the crown molding we added to the top as well. Slip each board's groove over the tongue of the previous one and align top edge with the layout line. Quickly pull the panels off the wall part of the way so the adhesive becomes stringy and covers more area on the back. So, if your ceiling is 96 above the finished floor then ⅓ of that would be 32. If you don't own one, get help cutting these. Measure up from the floor to the height you want your wainscot (ours is 35 inches), then use a level (or ideally, a laser lever) to extend this mark across the length of the wall. Follow along to learn how to install wainscoting the easy way.
1:40 install plinth blocks & pilasters.
Fit together any tongue and groove systems that your panels may have; Use a jigsaw or keyhole saw to cut the holes. What is the right height to install wainscoting? You may prefer to use new baseboards with a groove to hold the lower ends of the wainscoting boards. It's okay to have a little wiggle room. Apply 4 or 5 horizontal stripes of adhesive, each about a foot or two long. Installing wainscoting can be a tedious process, but it gives a look that you really can't reproduce any other way. I installed this wall treatment in my small laundry room to freshen up the look. Measure the positions of any outlets or other electrical boxes on the wall, then sketch the dimensions onto the backs of the corresponding panels with a pencil. Balance a level on top and adjust until bubble shows board is level. How to install wainscoting for a diy board and batten look. Apply adhesive to the backs of the baseboard pieces in a zigzag pattern and press them firmly into place. To install tongue and groove wainscoting, you'll need basic hand tools, a circular saw, a jigsaw and a pneumatic finish nail gun to complete this project.
This line marks the top of the paneling and upper rail. It's okay to have a little wiggle room. How to install wainscoting for a diy board and batten look. Measure the positions of any outlets or other electrical boxes on the wall, then sketch the dimensions onto the backs of the corresponding panels with a pencil. Cut 1 x 6 board to proper width for wall.
How To Install Wainscoting Lowe S from lda.lowes.com Wainscoting installation in the home Measure the positions of any outlets or other electrical boxes on the wall, then sketch the dimensions onto the backs of the corresponding panels with a pencil. Since we were doing wallpaper above our wainscoting, we decided to install the wallpaper before we added the top trim piece to the beadboard. Measure from the floor to the height you want (we recommend 35 inches), then use a level. Start a wainscot installation where it's most visible, and try to end it where it's least conspicuous. What is the right height to install wainscoting? Hang the beadboard wainscoting attach beadboard to the wall using construction adhesive and nails. Using a handsaw or circular saw, cut the wainscoting panels to the desired height.
Begin at the corner of the longest wall.
Start in one corner of the room with a full panel. The top of the panel should be flush with the level line on the wall and 1/16 inch from the adjacent wall. Über 7 millionen englischsprachige bücher. If your wainscoting design includes base molding, install those pieces before the panels. Wainscoting installation in the home Measure the positions of any outlets or other electrical boxes on the wall, then sketch the dimensions onto the backs of the corresponding panels with a pencil. In this video, we'll walk through putting beadboard in a small bathroom and how to cut around pipes, counter. 2:53 cut out for outlet with reverse molding. Finish with paneling nails, taking care to match them up with your marked studs. Step 4 glue and nail photo by david carmack. Hold in place, lining bottom edge up with pencil mark. First, using a stud finder, locate and mark the center of each stud along the walls (image 1). Measure up from the floor to the height you want your wainscot (ours is 35 inches), then use a level (or ideally, a laser lever) to extend this mark across the length of the wall.
